The side illumination of the first revision of the Gravity TKL keyboards is configured with a separate key combination "FN + Home". This illumination zone has several effects of its own.
If you are not satisfied with the built-in lighting effects of the side illumination, you can update the keyboard firmware - the key illumination and side illumination will be configured in the software synchronously. Remove the previous version of the software and update the keyboard firmware. To update the firmware, download and open the corresponding file:
download for Gravity TKL (HTK560)
download for Gravity TKL (HTK561)
download for Gravity X TKL (HTK550)
download for Gravity X TKL (HTK551)
After clicking on the link, you will download a file with the firmware and a new version of the software for settings. After the firmware update, the side backlight will not be separately configured.
Service mode activation
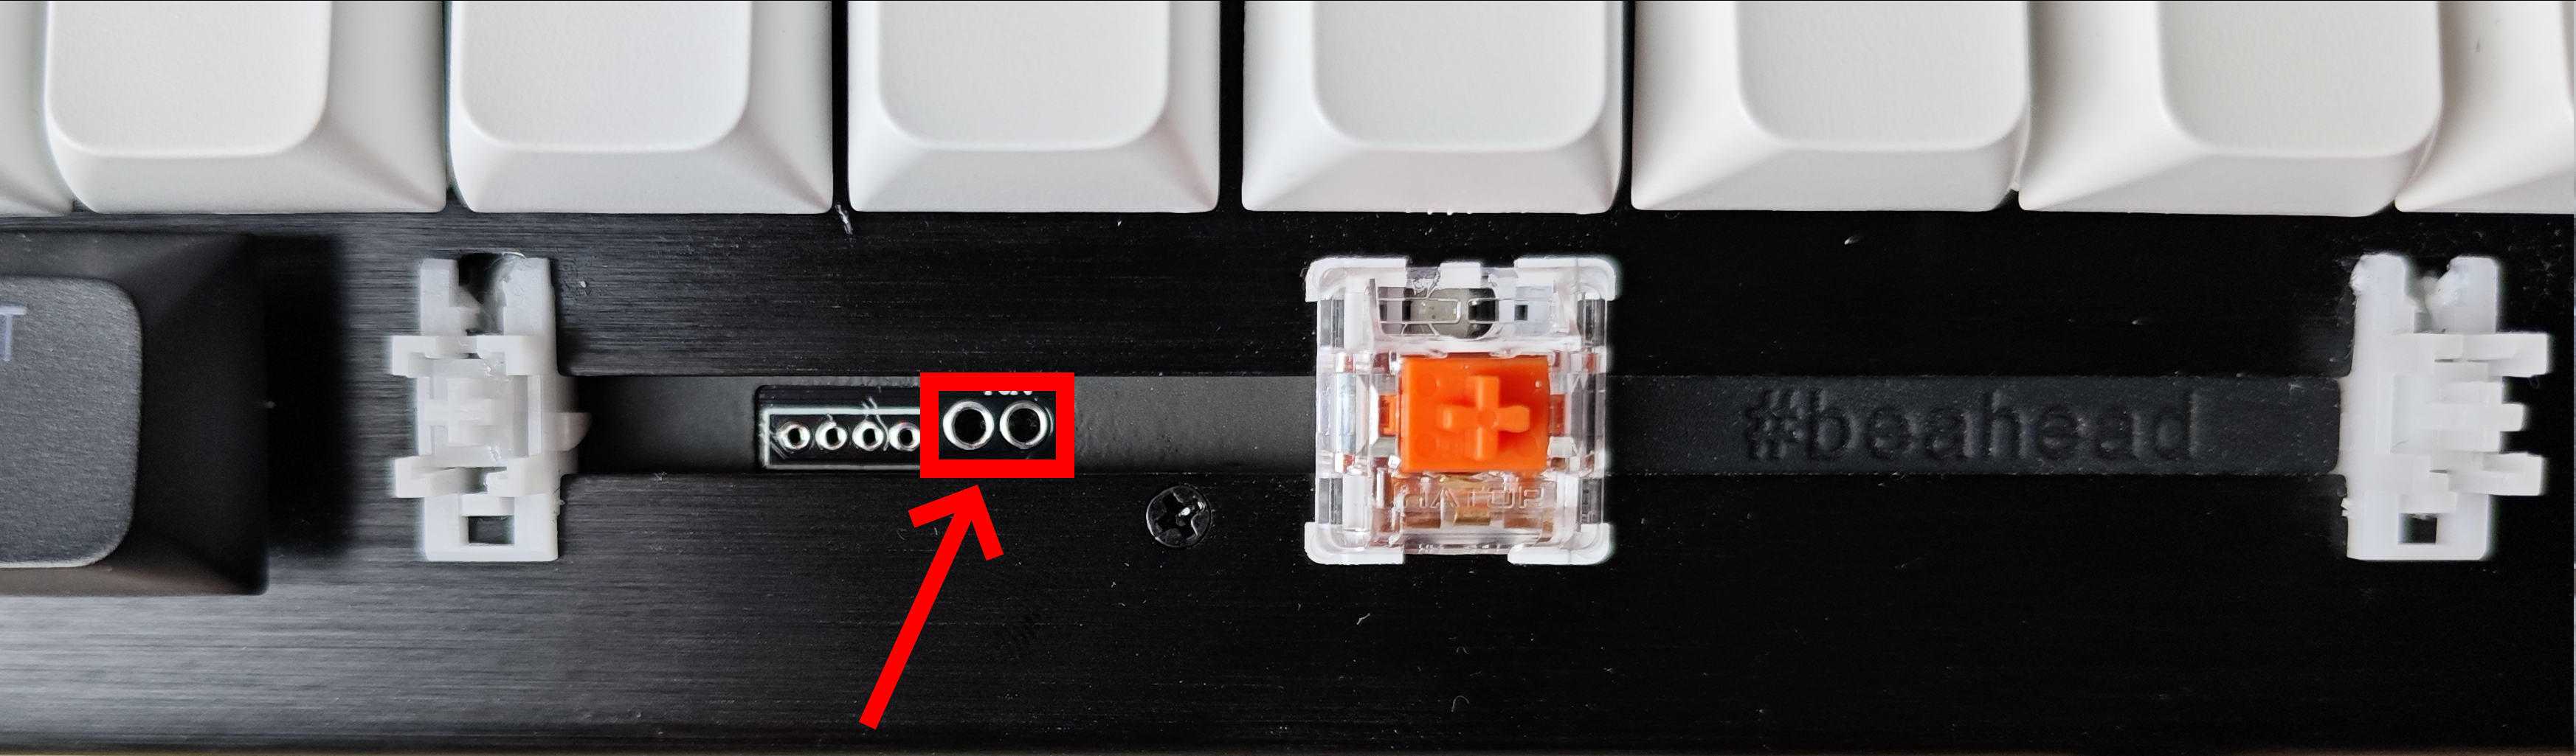
Disconnect the USB cable from the keyboard. To access the contacts, carefully remove the Space keycap and the rubber plug to the left of the switch. To activate the service mode, the marked contacts must be shorted (connected to each other) with a jumper. Any metal object (paper clip, wire, and even nail scissors) can be used as a jumper.
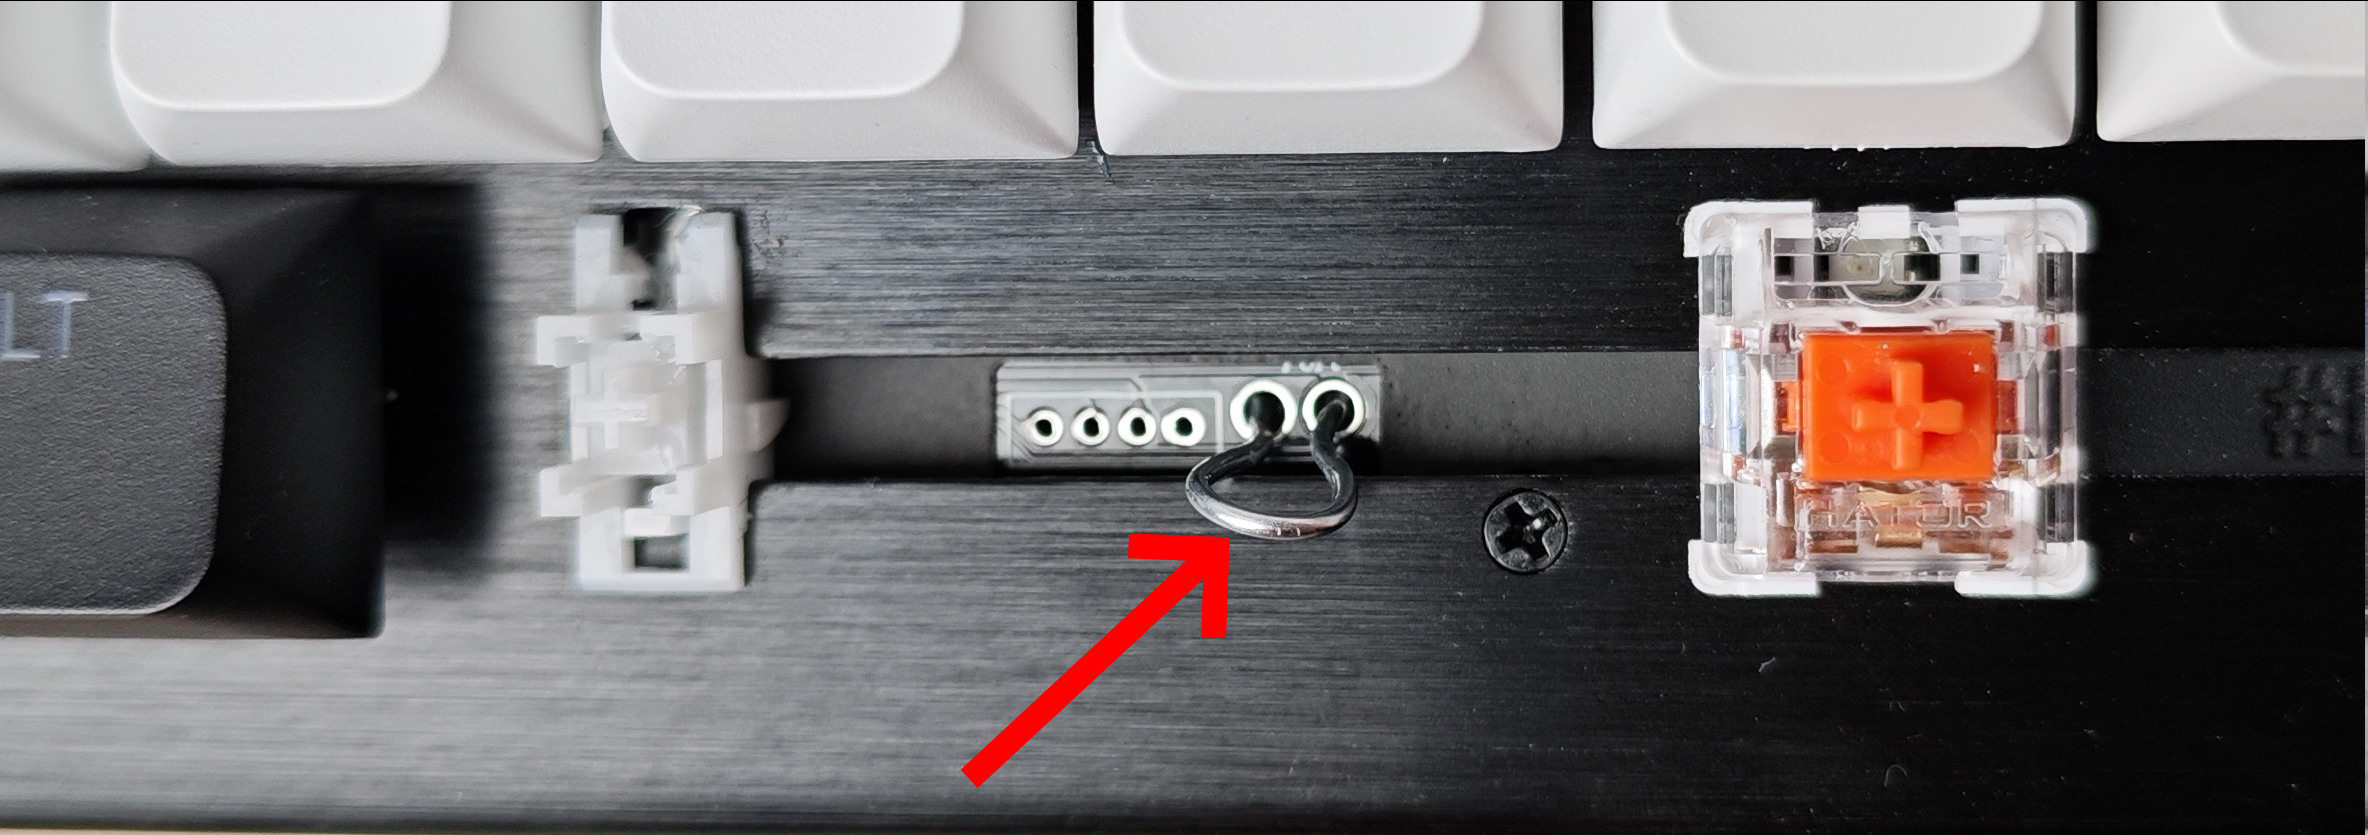
After connecting the contacts (shorting), you need to connect the USB cable to the keyboard. In service mode, the keyboard will not register presses, the backlight will not work. Pull out the jumper! The keyboard is ready for firmware.
Unzip the downloaded archive file, connect the keyboard to the computer and run the "Firmware" file.
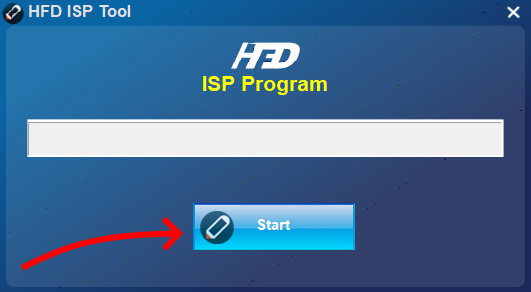
Click "Start" to update the firmware. After updating the firmware, install the new software version by opening the second "Software" file in the folder.
After updating the firmware, be sure to reset the keyboard settings by pressing the Fn+Esc combination.
